
5 steps to get your bike in shape for spring
The days are getting longer and the temperatures are on the rise. It is finally time for bike trips into the countryside. But lots of bikes are still in hibernation: with flat tyres and rusty chains. A complete check-up is what’s called for to get your bike back into shape.
Step1: Cleaning
A spa treatment for your bike
Even if some cleaning fans are overzealous when they set to work, a high-pressure cleaner is not suitable for cleaning your bike. The high pressure not only removes dirt, but also all of the oil and grease. Instead, you should clean your bike with special cleaners, such as BIKE LIQUIDS from SKS GERMANY. Care ranges like these usually not only remove stubborn dirt, but also clean components heavily contaminated with oil and grease.

Long-term preservatives, which are also included in the SKS range of care products, are perfect for maintaining your bike frame. Tip: Clean the frame thoroughly before use. After spraying, the material is protected against the effects of the weather with a dirt and water-repellent protective film.
Step 2: Lubrication
Stay wonderfully smooth at all times!
If you rest, you rust – and proper lubrication makes for enjoyable riding. These two phrases also apply to bikes.
After a winter break, it is essential to check your brakes and gears! Long-term lubricants are suitable for keeping derailleurs, chain rings, bearings, gear and brake cables and other components running smoothly. They protect against wear and reduce friction.
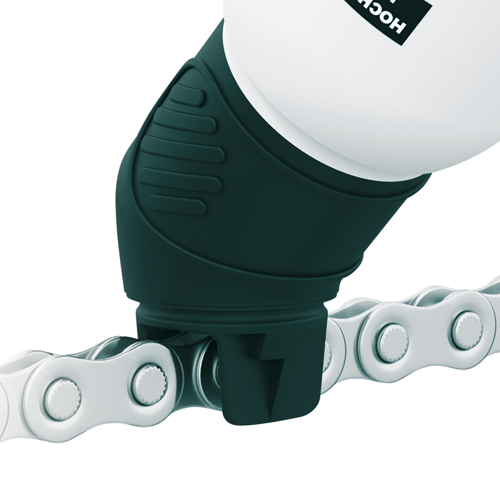
Your bicycle chain needs special care: If it is dirty and poorly lubricated, pedalling requires more effort. After a long time in storage, you should first run a cloth over your bike chain to remove any coarse dirt. We recommend using high-quality oils, such as LUBE YOUR CHAIN high-performance chain oil. The bottle comes with an applicator that allows for easy and clean application of the oil
Step 3: Tyre pressure monitoring
Simple and effortless!
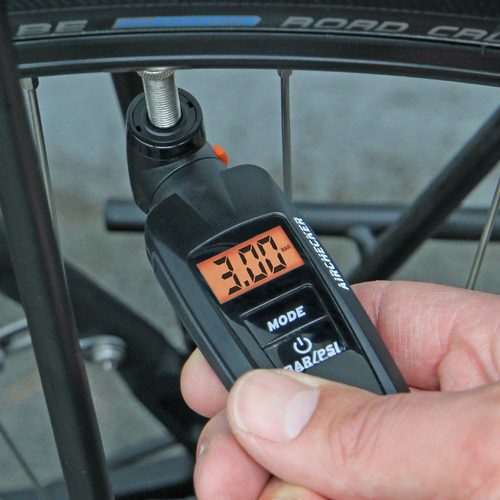
The spring check also includes monitoring the tyre pressure – which is easy to do with a digital air pressure gauge like the AIRCHECKER. Incidentally, the right tyre pressure determines the lifespan of the tyres and is the best protection against punctures.
Tip: The recommended air pressure is usually on the side wall of the tyre – with the minimum and maximum value.
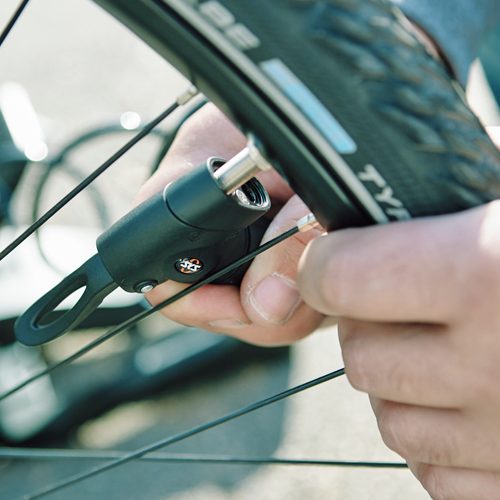
For those who do not want to do the “thumb pressure test”, then we recommend the AIRSPY compact and lightweight tyre pressure sensor. The little spy on the valve gives you the certainty that you are riding with optimum pressure. Once mounted, the sensor continuously measures the tyre pressure and transmits real-time data to compatible Garmin bicycle computers or smartphones using the SKS MYBIKE app.

Step 4: Inflating your tyres
A little fresh air?
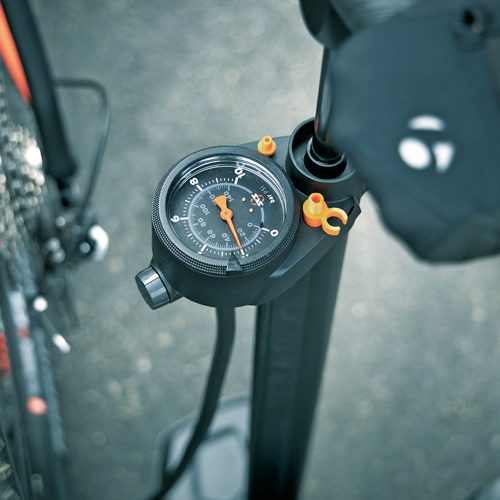
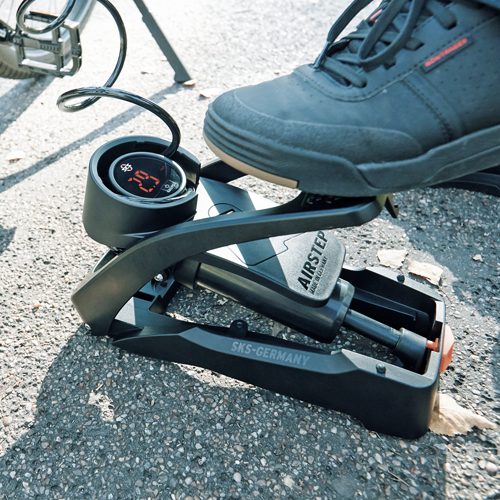
We recommend a floor pump with a pressure gauge for inflating your tyres. For example, you can read the air pressure really easily on the precision pressure gauge when you inflate your tyres with the AIRWORX 10.0. The AIRSTEP DIGI foot pump with a digital pressure gauge is also perfect for the controlled inflation of your tyres. The ergonomic operation of the foot pedal with an upright, back-friendly posture inflates your tyres in no time at all.
Both SKS pumps are equipped with the proven MULTI VALVE head for all types of valves.
Tip: When inflating your tyres, make sure that the valve is in the 12 o’clock position. This ensures that the unused valve opening is closed.
Step 5: Checking screw connections
Have you got a loose screw?
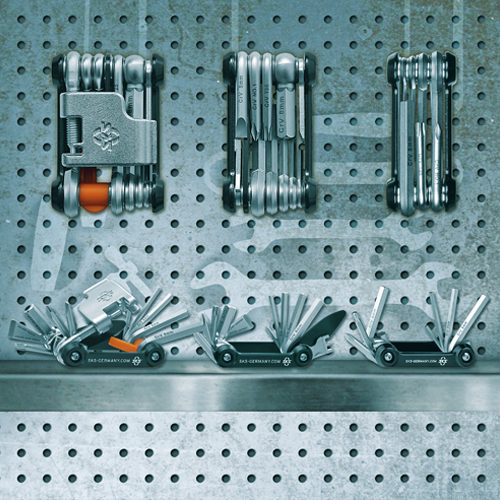
Finally, you should also test the lights to check that all screws are tight. Loose screw connections can be re-tightened in no time at all with a multi tool like the TOM 18. Then raise your bike and let it drop slightly. If nothing rattles, all the screws are tight so nothing else stands in the way of your next bike tour.